Can You Create a PST File from Office 365?
Yes, you absolutely can create a PST file from Office 365—and it’s a significant step for many tasks like backups, migrations, and account conversions. In this article, we are going to give multiple ways with professional tool such as- office 365 backup and Restore Software to successfully and easily create PST File from Office 365 Online. You can read all the provided methods and decide which one suits your requirements in a better way.
A PST (Personal Storage Table) file is used by Microsoft Outlook to store important data like emails, journals, calendars, contacts, and tasks on your computer. On the other hand, Office 365 is a cloud-based service from Microsoft that provides email and other productivity tools. Since it’s cloud-based, you can access your emails and files anytime, from anywhere, as long as you have an internet connection.
Why Do We Need to Create PST File from Office 365 Online?
A cloud-based service like Office 365 was once recognized for being very protected. But now, it faces many risks like cloud ransomware attacks and online hacking. Because of these coercions, several users no longer feel completely safe keeping all their data only in the cloud. That’s why they favor to make a backup — a local copy of their Office 365 data — just in case something goes wrong.
With help of creating PST File, users can restore their emails and mailboxes items with other important data on their computer. This way, they can protect their details and access it anytime, anywhere, even without an internet connection.
There are also other reasons why someone might want to back up their Office 365 account. Let’s understand this better with a real-life example:
“Hi, I’m in the process of shifting to a new job at a bigger company. I’ve been using Office 365 for all my emails. Now, I want to back up all my personal emails, journals, inbox items, outbox items, task, contacts, and calendar events so I can still access them later on my computer using Microsoft Outlook. I’m looking for an easy and simple way to create a PST file from my Office 365 account that includes all this data. Any suggestions would be really helpful!"
How to Export a PST File from Office 365
Creating a PST file from Office 365 naturally includes exporting mailbox data using Microsoft Outlook. Here’s a step-by-step guide:
- Open Outlook: Make sure your Office 365 account is connected to Outlook.
- Go to File > Open & Export > Import/Export: This opens the Import and Export Wizard.
- Choose "Export to a file": Click “Next”.
- Select “Outlook Data File (.pst)”: Click “Next”.
- Choose the mailbox folder to export: Select your inbox or other folders as needed.
- Pick a location to save the PST file: Name your file and choose a folder on your device.
- Complete the export: Click “Finish” and set a password if desired.
That’s it! You now have a PST file that you can use for other tasks, like upload PST to Office 365 later on.
How to Import PST to Office 365
After creating a PST file, the next logical step might be to import PST to Office 365. This is especially useful if you're migrating from an older Outlook version or another system. There are a few ways to do this:
- Using Outlook
This is the simplest method for individuals:
- Open Outlook.
- Go to File > Open & Export > Import/Export.
- Choose “Import from another program or file”.
- Select “Outlook Data File (.pst)”.
- Browse to the PST file you exported.
- Choose how to handle duplicates and pick the mailbox where data should go.
- Using Microsoft’s Import Service
For large-scale business migrations, Microsoft offers an Office 365 Import Service that lets you upload PST to Office 365 through Azure storage. This is a more technical process and is ideal for bulk importing PST files into Office 365.
Create PST File from Office 365 Online Using Best Tool
The manual methods we talked about previous have numerous problems. They are not easy for regular users to follow, and the steps can be puzzling. One wrong move could lead to losing significant data forever. Because of these risks, we advise using a professional software tool instead. It’s a much safer and more reliable option compared to doing it manually.
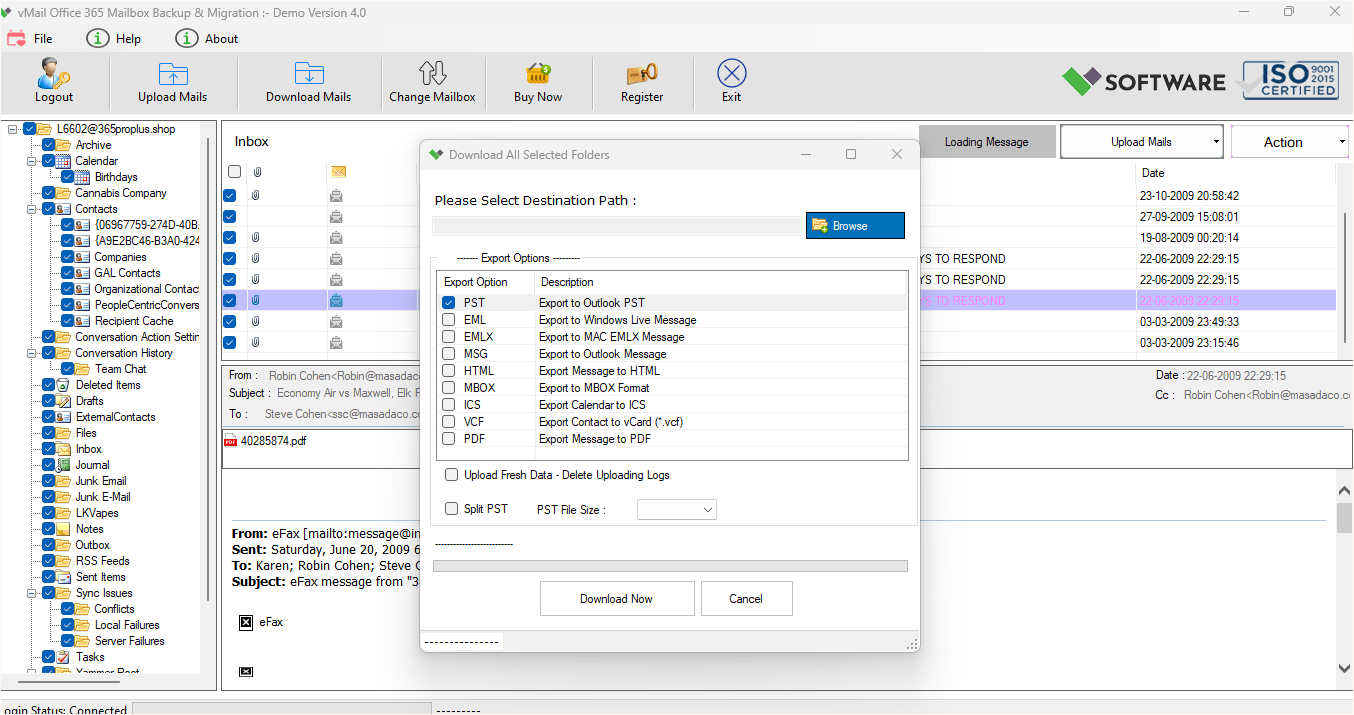
This vMail Office 365 Backup & Migration tool can create a PST file from your Office 365 account and includes everything—emails, contacts, calendars, tasks, and more. Best of all, it’s simple to use. Here are the easy steps to create a PST file from Office 365 using this Office 365 Mailbox Backup tool:
STEP 1 : Open vMail Office 365 Mailbox Backup Tool

STEP 2 : Login to Office 365 Mailbox Users Account

STEP 3 : Scanning and preview Office 365 User Mailboxes

STEP 4 : Message Preview of User Mailboxes Account

STEP 5 : Download Mails - Get Mailbox Backup

STEP 6 : Get Backup Option - Settings

STEP 7 : Start Get Mailbox Backup Process

Conclusion
So, back to the original question: Can you create a PST file from Office 365? Absolutely. Whether you're backing up data, preparing for a migration, or setting up a new user environment, exporting a PST file can be a critical part of your workflow.
And once you have that PST file, you can easily import PST to Office 365, upload PST to Office 365, or migrate PST to Office 365 as needed. Whether you're an IT professional overseeing a complex Outlook to Office 365 migration, or a single user trying to migrate Outlook to Office 365, understanding PST files and how to use them will make your job much easier.
Always remember to keep your data secure during these processes, and make use of Microsoft's tools and resources to ensure everything goes smoothly.

Comments